


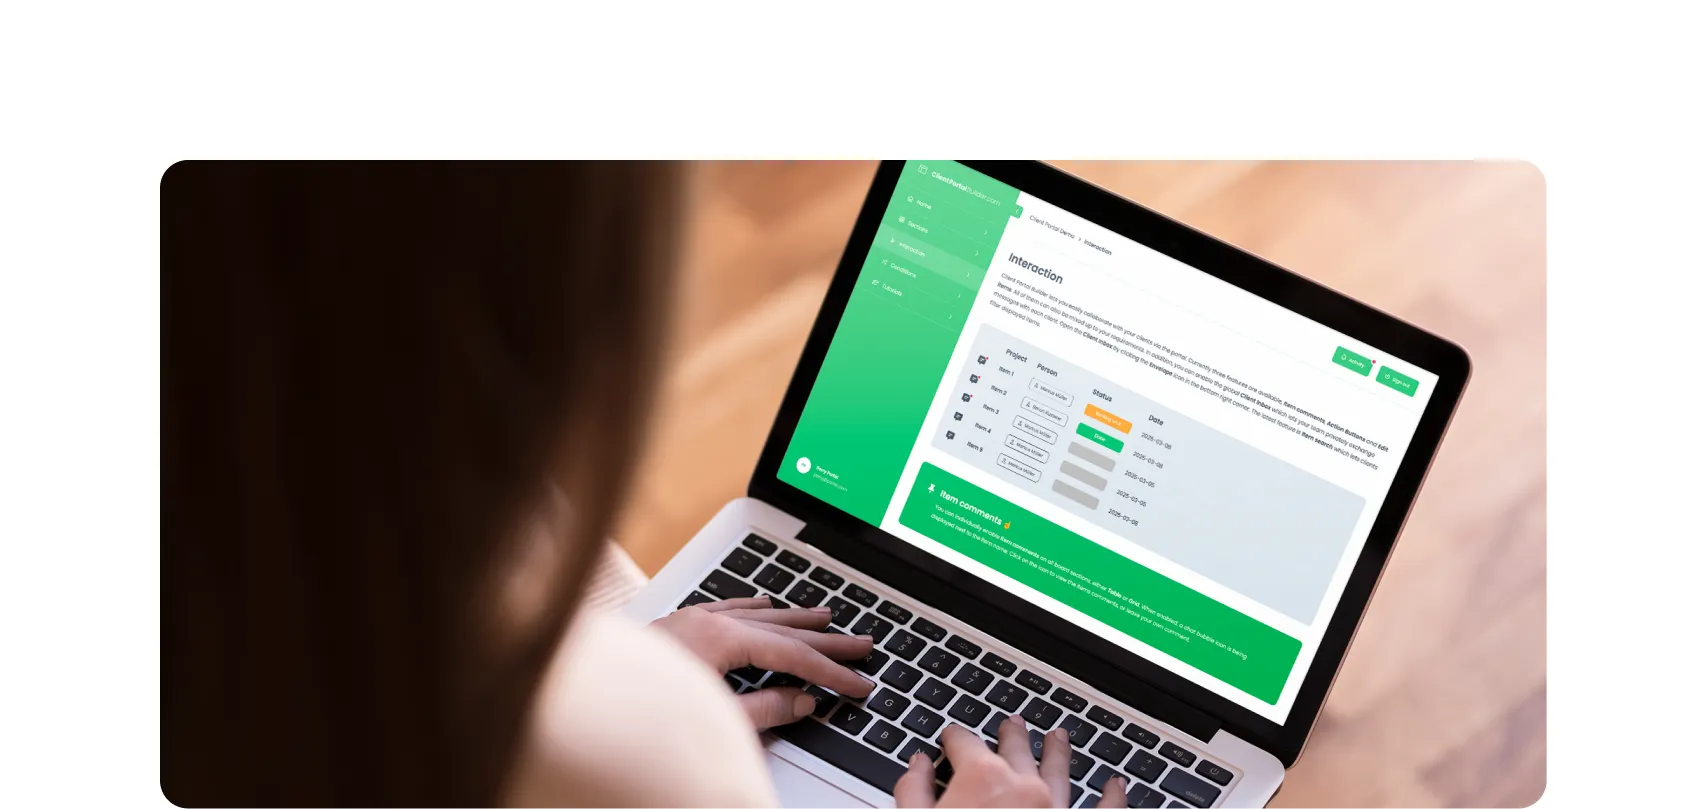
Build custom, structured Excel reports from monday.com board data and send them automatically to the right people on schedule.


How to build a client dashboard in your monday.com client portal
A good portal home page tells clients where things stand and what you need from them. Here is how to build that page from sections you already have, with live data from monday.com.

Table of contents
Use the navigation below to quickly jump to your desired section and learn more about each topic.
When a client signs in to your portal, they rarely want to browse. They want to know if everything is on track and if they need to do anything. If the home page only welcomes them and links to other pages, they have to click through tables to find out, or they send you an email instead.
With Client Portal Builder for monday.com, the home page can answer those questions directly. By combining a few standard sections, you get a client dashboard that is personal to each client and comes straight from your monday.com boards. This guide walks through how we would build one, section by section.
Client Portal Builder creates a dedicated client facing layer around the boards and workflows you already manage in monday.com. Give clients secure access to selected information and actions without rebuilding the underlying workflow somewhere else.
The idea
Start with the questions your clients ask
A client dashboard doesn't need charts. The portal doesn't offer chart sections, and most clients don't need them. What they need is a quick answer to four questions, and each of them maps to one section on the page:
- Where do things stand? Key figures with the numbers that matter.
- What do you need from me? A table with only the items waiting for the client.
- Who can I talk to? A callout with a personal contact.
- Where do I find the rest? Teasers that link to the detail pages.
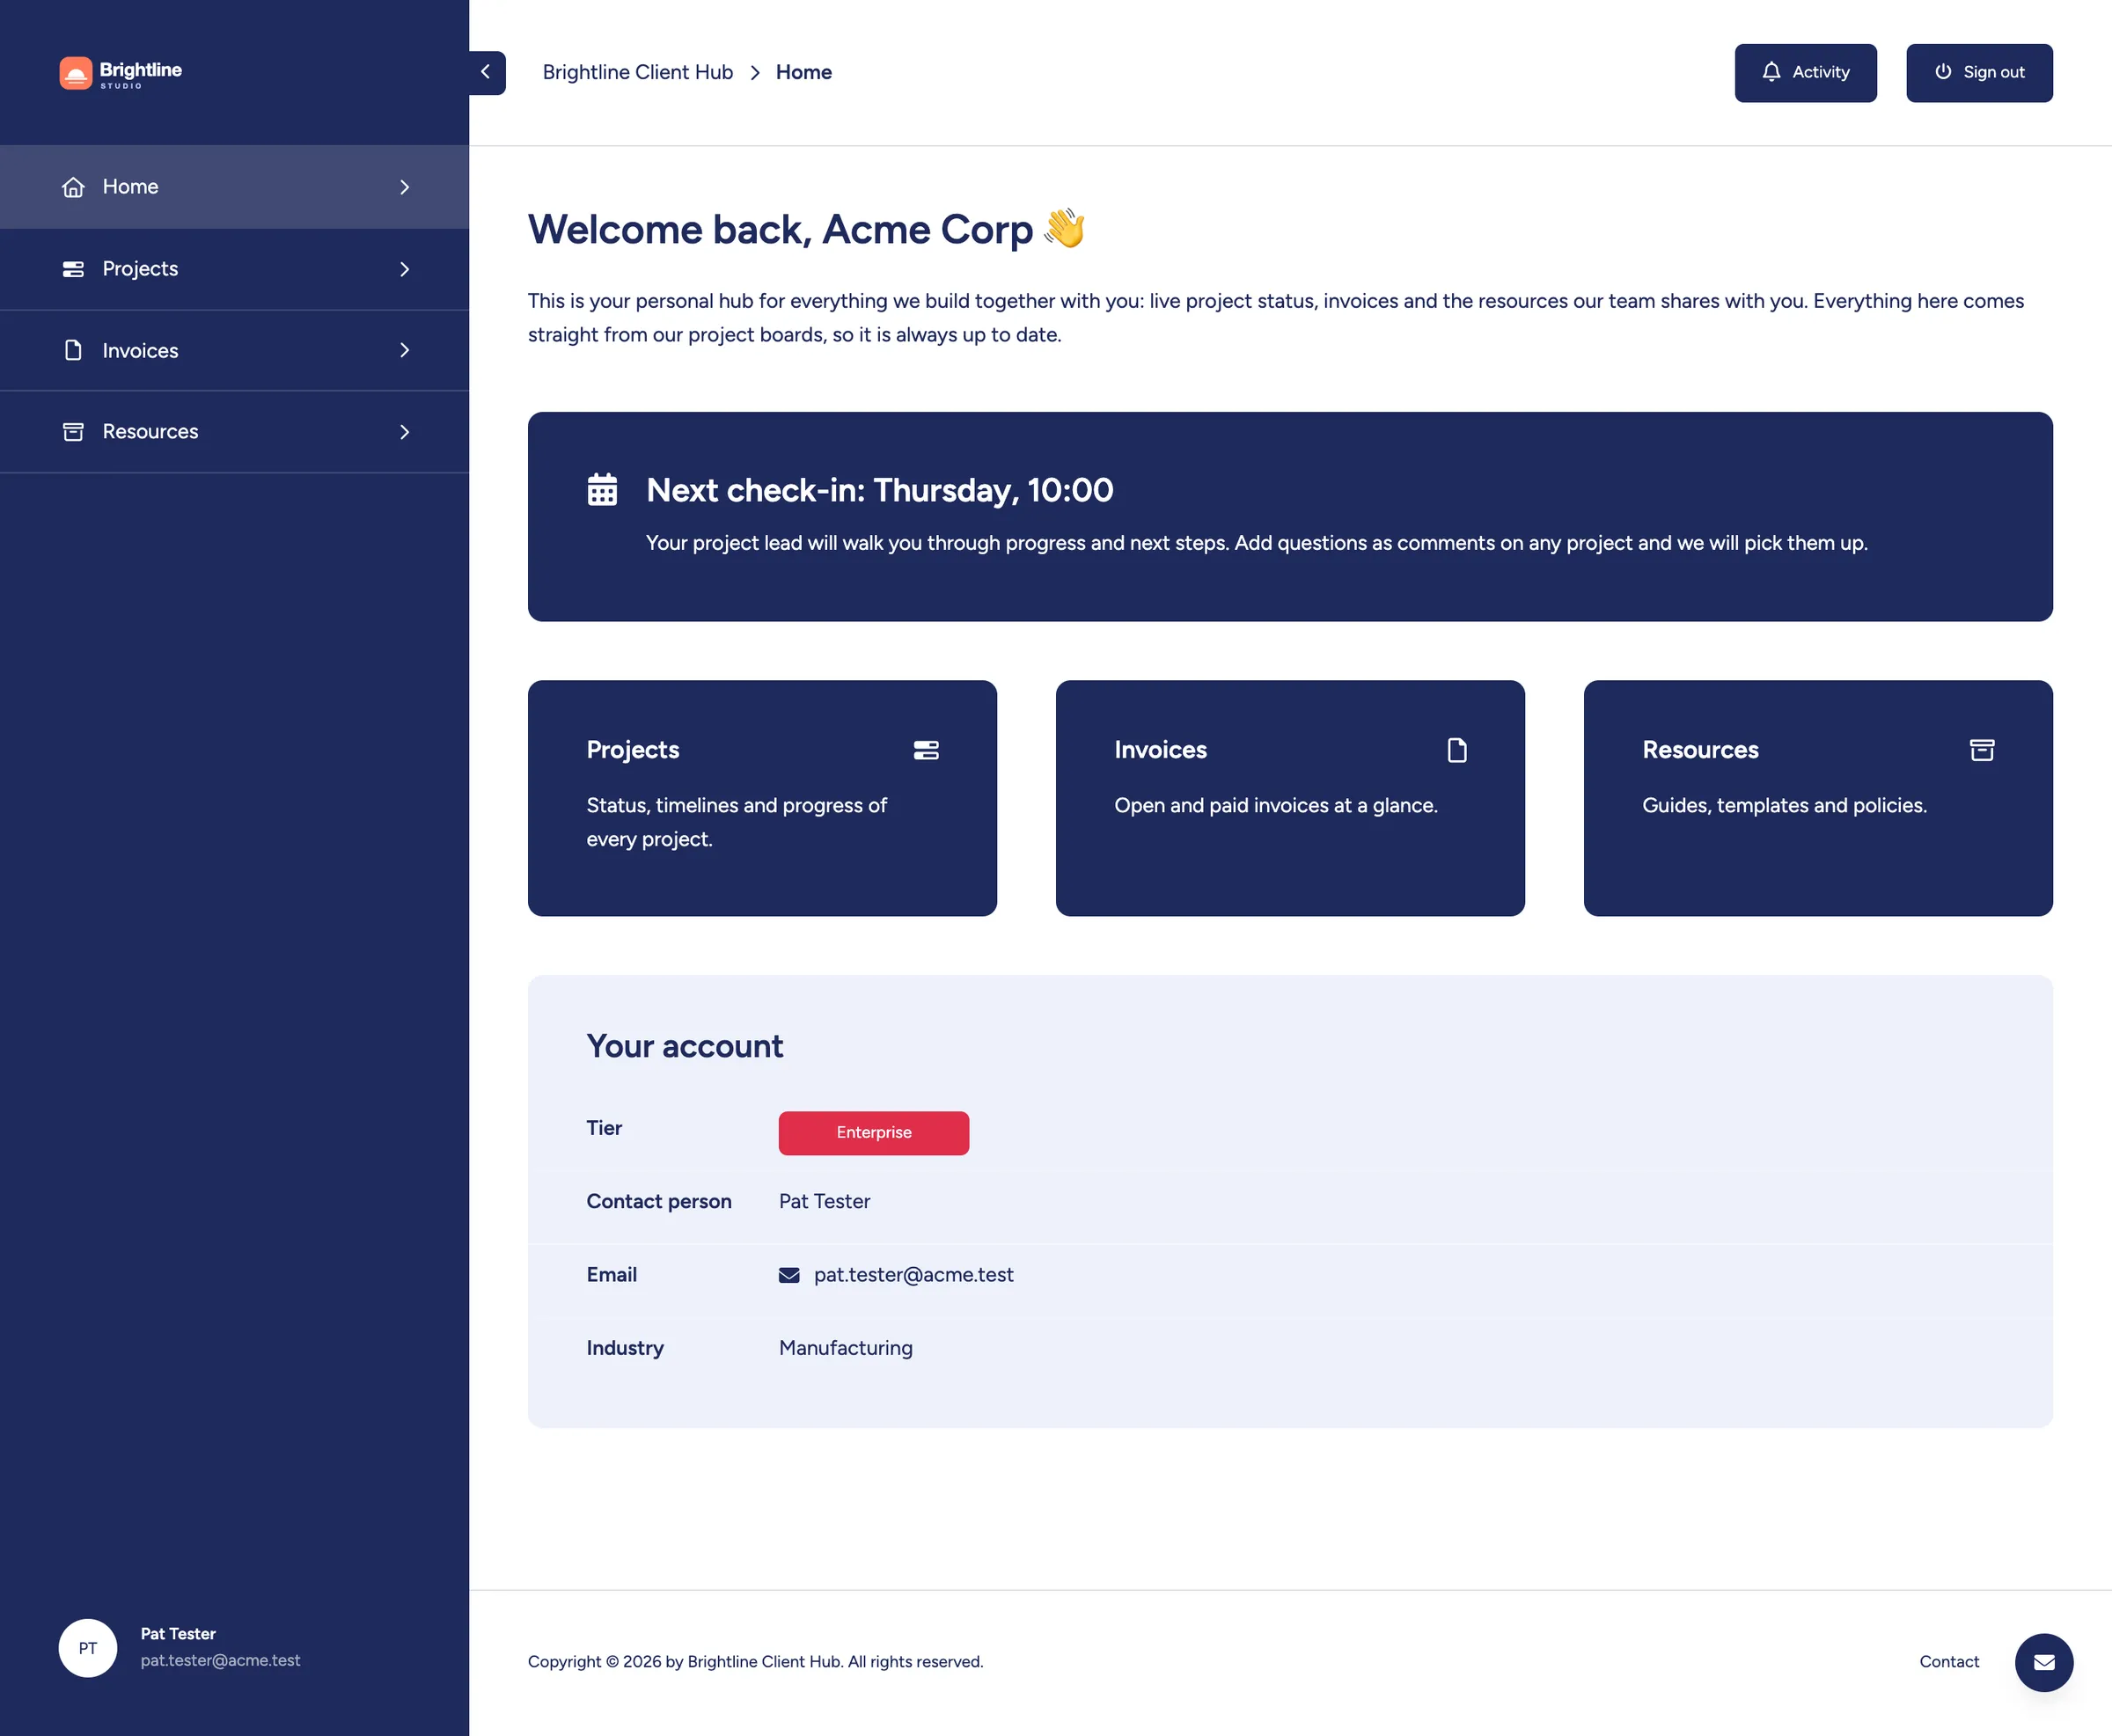
Move the slider to compare a typical welcome page with the same page built around these questions.
Welcome
Make it personal in one line
Start with a Text section that greets the client. The placeholder {{client.name}} inserts the name from your Clients Board, so one headline works for every client. Keep the text short, because the useful part of the page comes right below it.
Status
Show where things stand with key figures
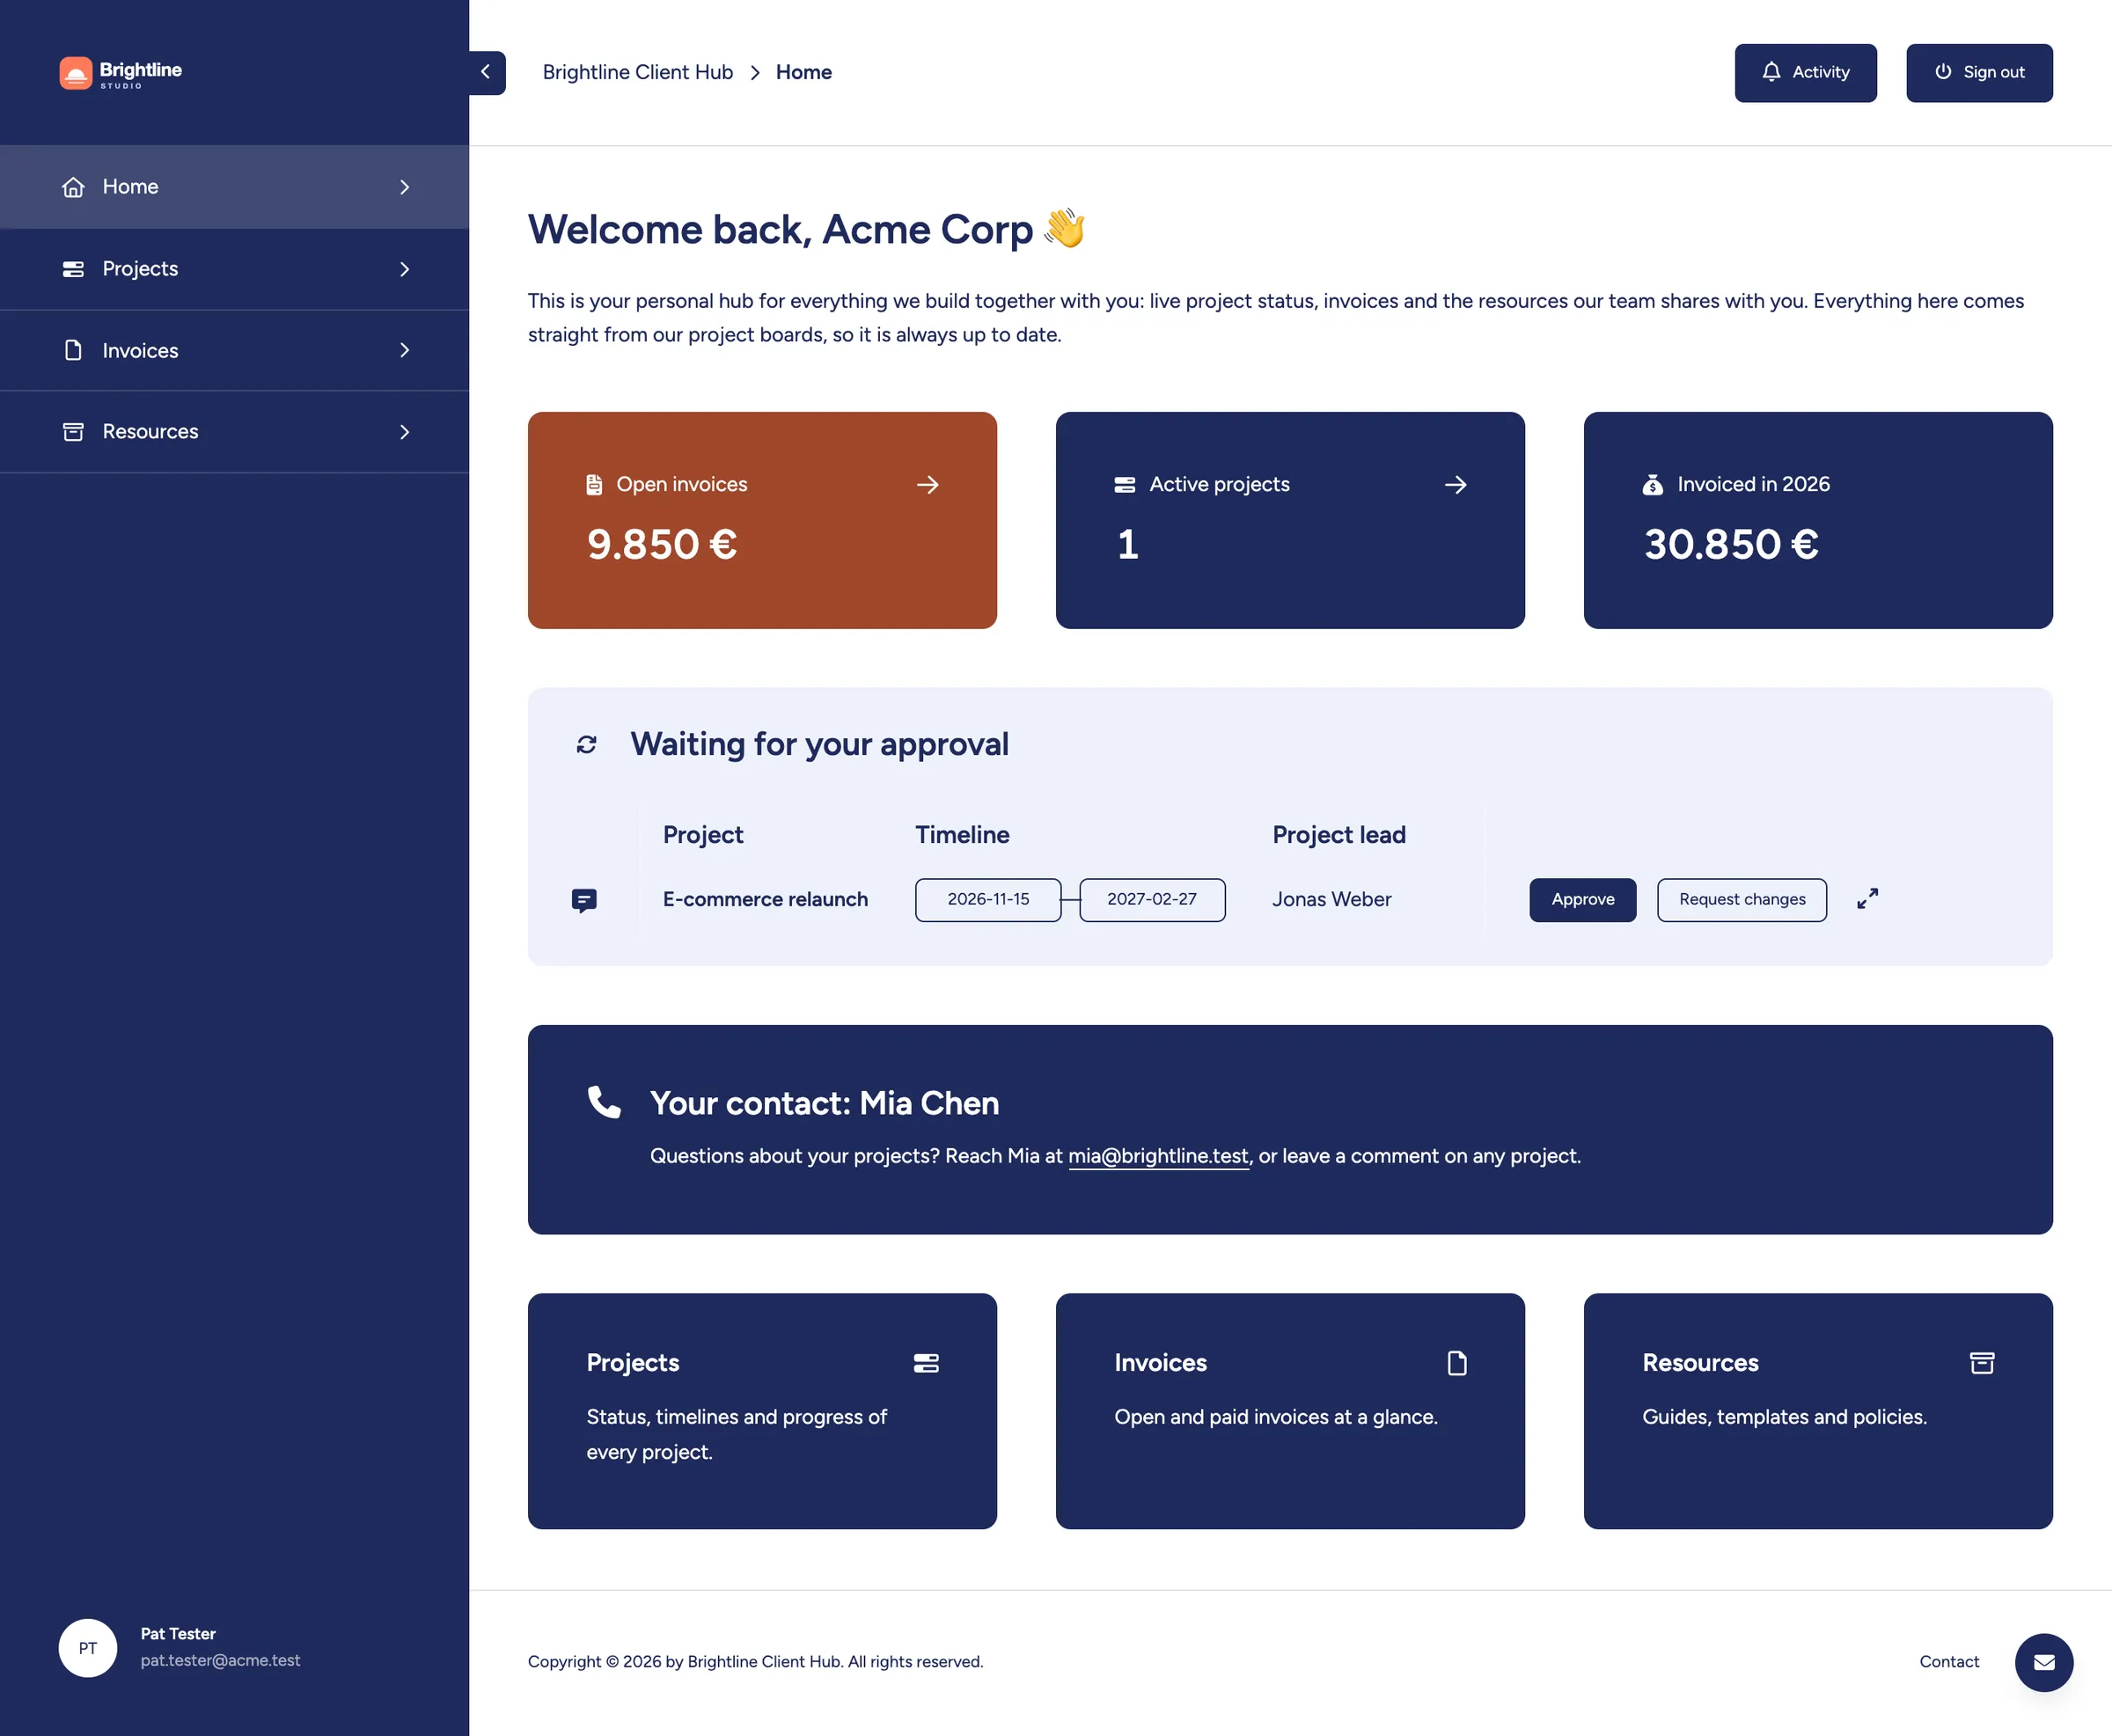
Put the numbers that matter directly below the welcome text. Key figures are cards with a total, an average or a count from your boards. Pick two to four numbers a client would otherwise ask you about, such as open invoices, active projects or remaining hours.

Two details make the cards work well on a dashboard. Link a card to the page with the items behind the number, so that a client can go from the total to the details in one click. And give the card that needs attention a different color, like the open invoices in our example.
Next steps
Put open approvals on the home page
The most useful part of a dashboard is often the shortest: what the client has to do next. Add a Board Table section to the home page, and use a board filter to limit it to items waiting for the client, for example everything in a Ready for client review status. Show only the columns needed for a decision.
Action buttons then let the client respond right there. Approve and Request changes can each trigger a monday.com automation on the item, and once the status changes, the item leaves the table.

For the whole workflow behind this table, see our guide on how to manage client approvals. The same pattern works for anything a client has to act on, such as documents to sign or information you are missing.
Contact
Show clients who to talk to
A dashboard is also a good place for a human touch. A Callout section with a name and an email address saves clients from searching through old messages. Choose a fitting icon, and keep the text to one or two lines.

If different people look after different clients, add a column such as Account manager to your Clients Board, and use its placeholder in the callout. Every client then sees their own contact, and a change on the board updates the portal.
The callout can also point to the channels your portal offers, such as item comments for questions about a project and the Client Inbox for everything else.
Navigation
Link to everything else with teasers
The dashboard shouldn't try to show everything. Finish with Teaser cards that lead to your detail pages, such as projects, invoices and resources. A short line on each card tells clients what they will find there.

Every client
One page, a different dashboard for each client
You build this page once. Because every section reads from your boards, each client sees their own numbers and their own open items. Here is the same page for two clients of our demo agency: Acme Corp has a project to approve, Globex Industries has nothing waiting.
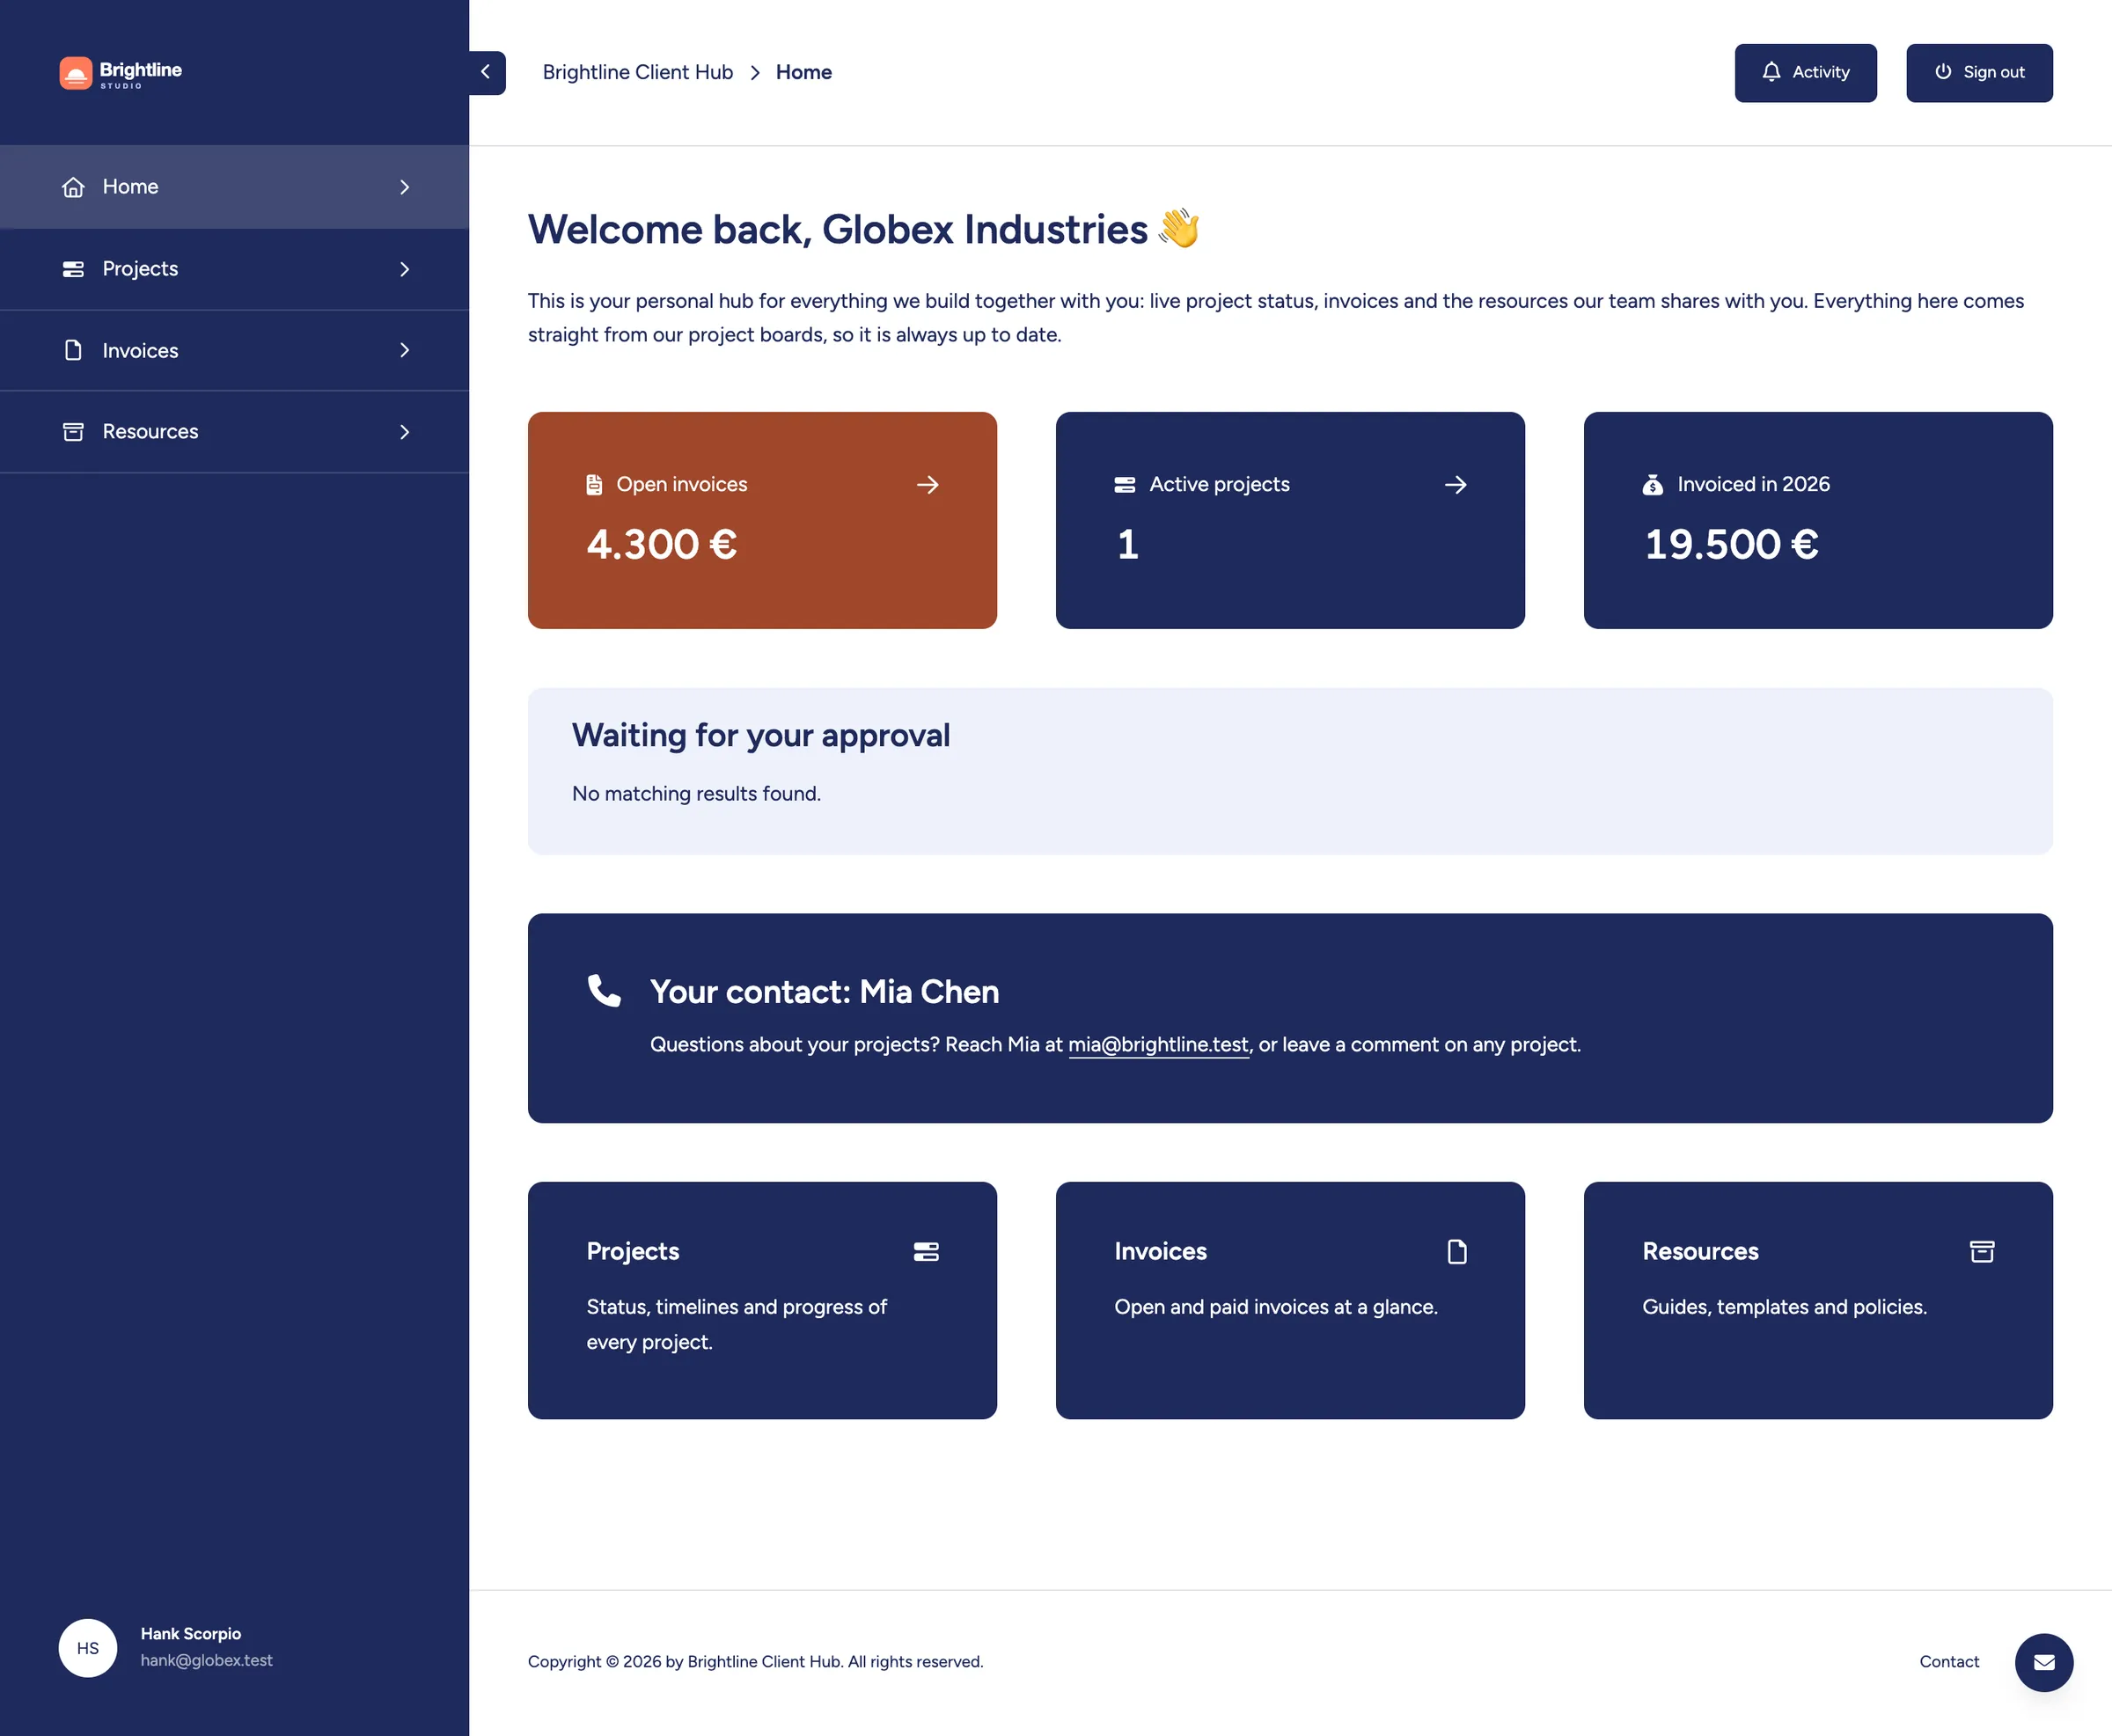
A client with nothing to approve sees the table's headline with No matching results found. That is why a headline such as "Waiting for your approval" works well: an empty table still answers the client's question.
Many clients will open the portal on a phone, between two meetings. There, the sections stack in the order you chose, so keep the most important one near the top. Tables keep their width and scroll sideways, and action buttons sit at the end of a row, so limit a table with buttons to the columns a client really needs.

Tips
Checklist for a useful client dashboard
- Build the page around the questions your clients ask, not around your boards.
- Keep status and next steps near the top, and links further down.
- Limit key figures to the numbers a client would act on or ask about.
- Filter tables down to what needs attention, and leave the full lists on detail pages.
- Name a real person as a contact.
- Preview the portal as different clients before you publish, including one with no open items.
Summary
A home page that answers the first questions
A client dashboard doesn't take a special feature, just a clear idea of what clients want to know first. Key figures show where things stand, a filtered table shows what's next, a callout shows who to talk to, and teasers lead to the rest. Since all of it comes from monday.com, the page stays up to date while your team works the way it always has.
Build your client dashboard
With Client Portal Builder for monday.com, you can build this page from standard sections and your existing boards. To get started, see how to set up key figures and add action buttons in the documentation.
Interested in a product demo?
Let's learn about your requirements, answer questions, and
review ways how we can help you and your organization with
our monday.com apps and solutions.
