Leverage templates to manage, merge, calculate and export board items to Excel spreadsheets and email them periodically with automations.


Overview
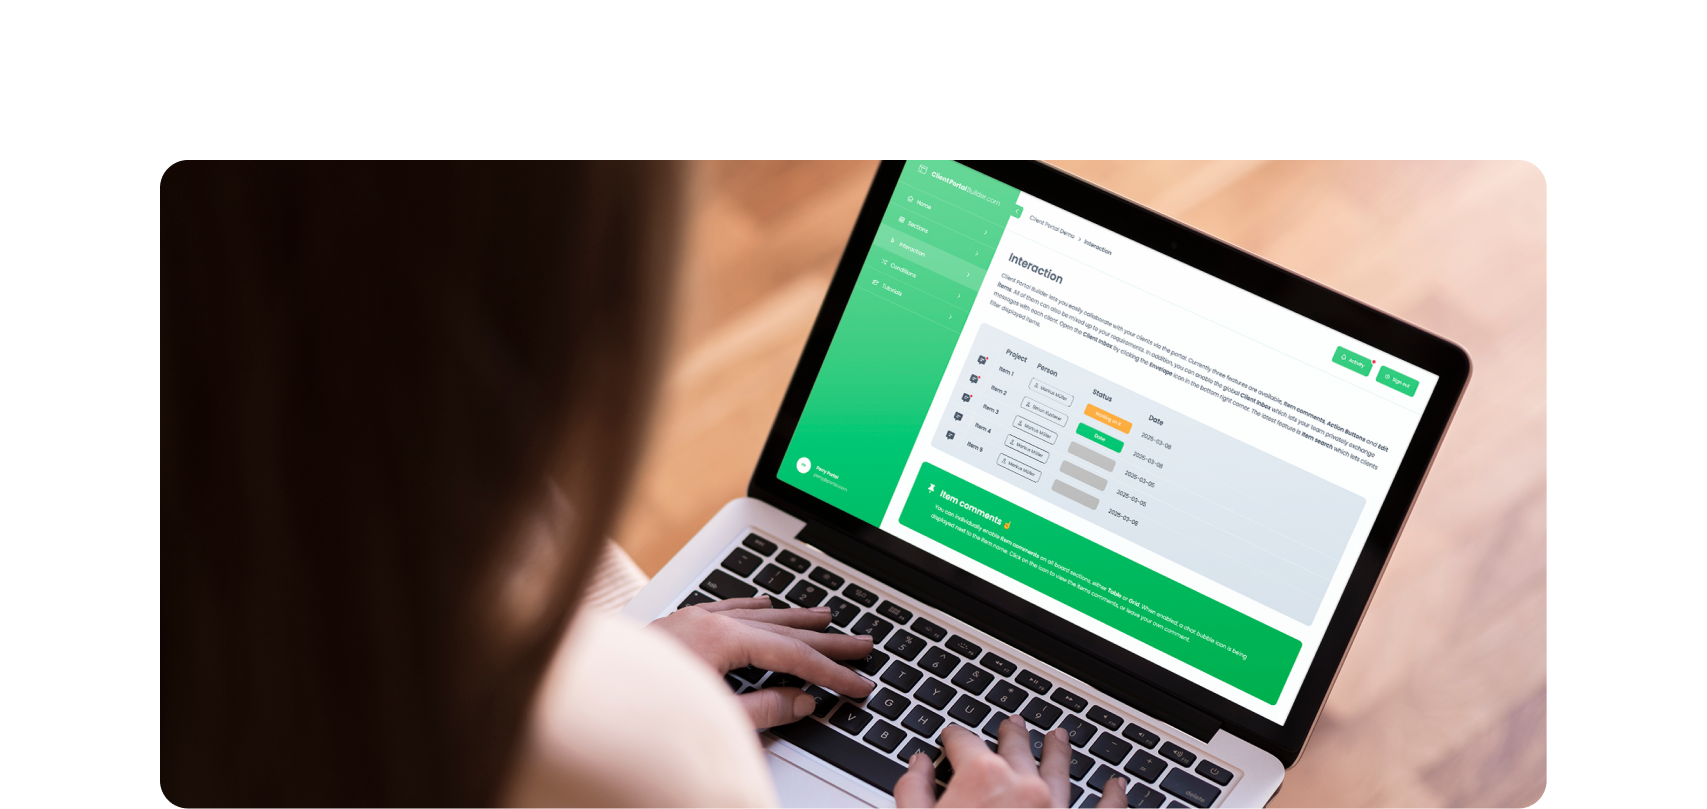
Let clients trigger board automations from within monday.com client portals
This guide explains how to let your clients trigger automations from your monday.com client portal using action buttons. Each action button triggers an automation based on its unique Action ID.
How it works
How action buttons work
Action buttons are displayed on items in the client portal and allow clients to trigger automations. Each action button:
- Has a unique and required Action ID
- Triggers an automation on the target board when clicked
- Can be conditionally displayed based on a Status column value
Did you know?
Automations reference the Action ID, not the column value itself.
Action buttons
Create action buttons with Action IDs
- Open the board section in the app.
- Add
+up to two Action Buttons. - For each button:
- Select a button style
- Enter a short actionable label
- Define a unique Action ID without blanks
Did you know?
Action IDs are required and must be unique per button and board.
Conditions
Configure conditional display
Action buttons can be shown or hidden based on the value of a Status column on the connected board.
- Choose which Status column should be referenced.
- Define which button is shown for each status value.
For example:
- Show Approve and Reject when status is Pending
- Hide all buttons when status changes to Approved or Rejected
Did you know?
Using conditions ensures clients only see actions that are relevant to the current state of the item.
Automations
Create the monday.com automation
You can create the automation in two ways. Either use the provided automation template or create an automation from scratch.
Use the provided automation template:
- Open Automations on the connected board.
- Find the Client Portal Builder automation template.
- Click
Use template. - Enter the Action ID you defined for the button.
- Enter any other required information.
- Create the automation.
Create an automation from scratch:
- Open Automations on the connected board.
- Click Create automation and Create from scratch.
- Choose the trigger: Client Portal Builder Button Click
- Enter the Action ID exactly as defined in the app.
- Add the action you want to run on click.
Validation
Test the automation setup
- Open or preview the client portal as a client.
- Confirm that buttons appear only for the intended status.
- Confirm that clicking a button triggers the automation.
- Verify the automation runs correctly on the board.
Best practises
Recommended setup
- Use short and clear button labels, such as Approve and Reject.
- Use short and clear Action IDs, such as approve and reject.
- Keep Action IDs unique and without any blank spaces.
- Keep Action IDs stable once automations are live.
- Always control button visibility using status conditions.
- Test automations with a sample item before sharing with clients.