Leverage templates to manage, merge, calculate and export board items to Excel spreadsheets and email them periodically with automations.


Overview
How to create and manage monday client portal pages
Portal pages define the main navigation of your client portal. Each page appears as a menu item and contains one or more content sections. They let you structure your portal into clear, navigable views so clients can easily find the information they need when browsing their monday.com client portal.
Did you know?
You can display portal pages conditionally per a client status. Learn how to set up a condition.
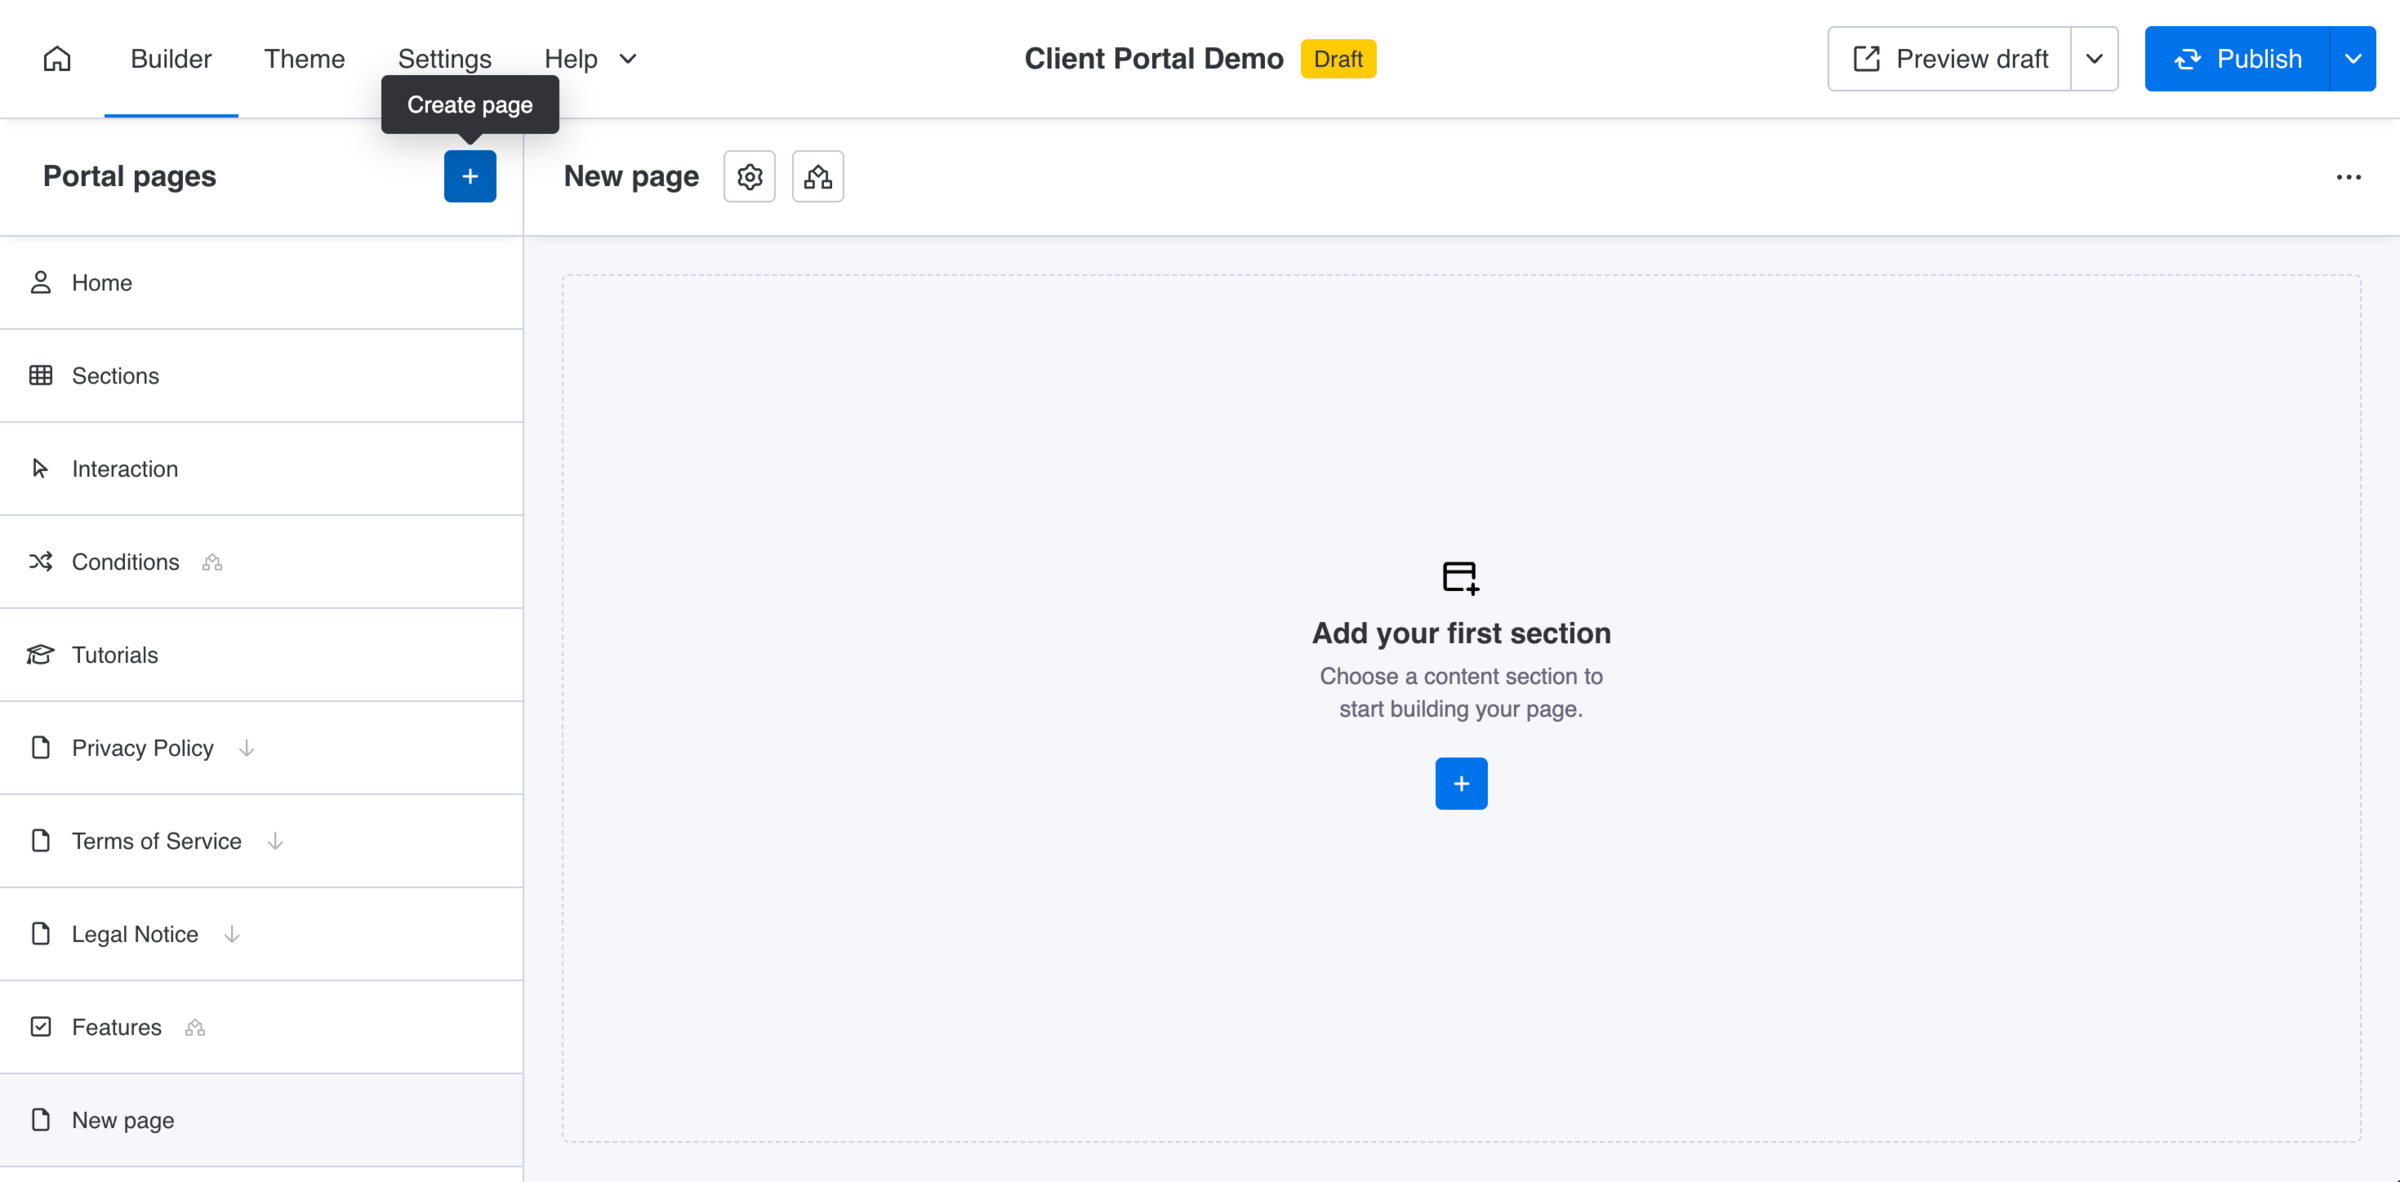
Create page
Add a new page to your portal
Use the + button in the Portal pages panel to create a new page. The page will appear in the navigation and can be filled with content sections. Portal pages created within the Builder reflect in the same order of appearance directly in the client portal.
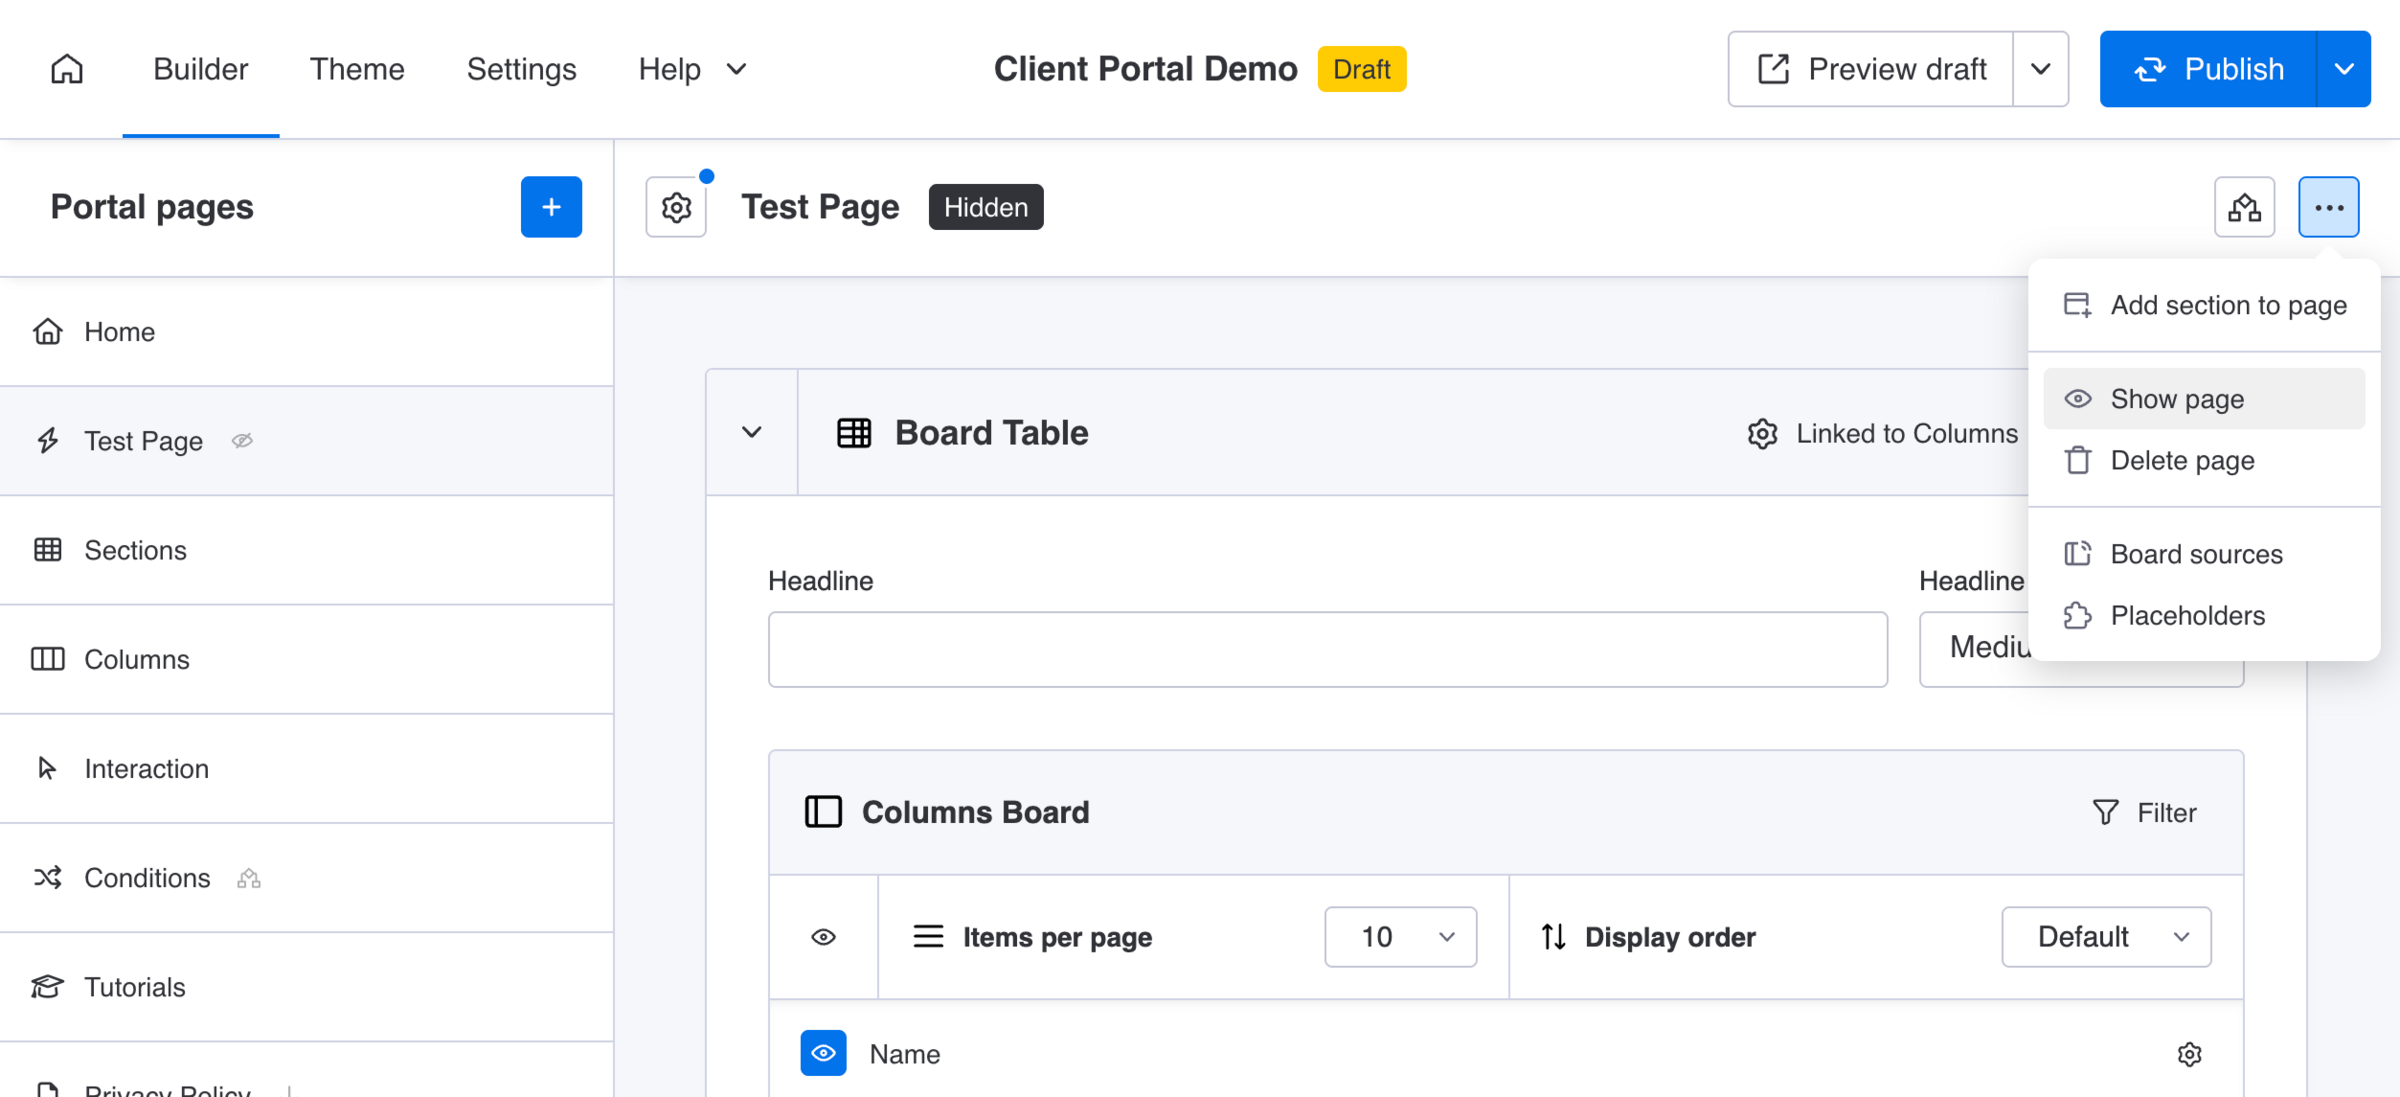
Manage pages
Delete or arrange the order of a page
Delete a page from the page list to remove it and all its content sections from the portal. Drag and drop pages in the Portal pages panel to control the order in which they appear in the client portal.

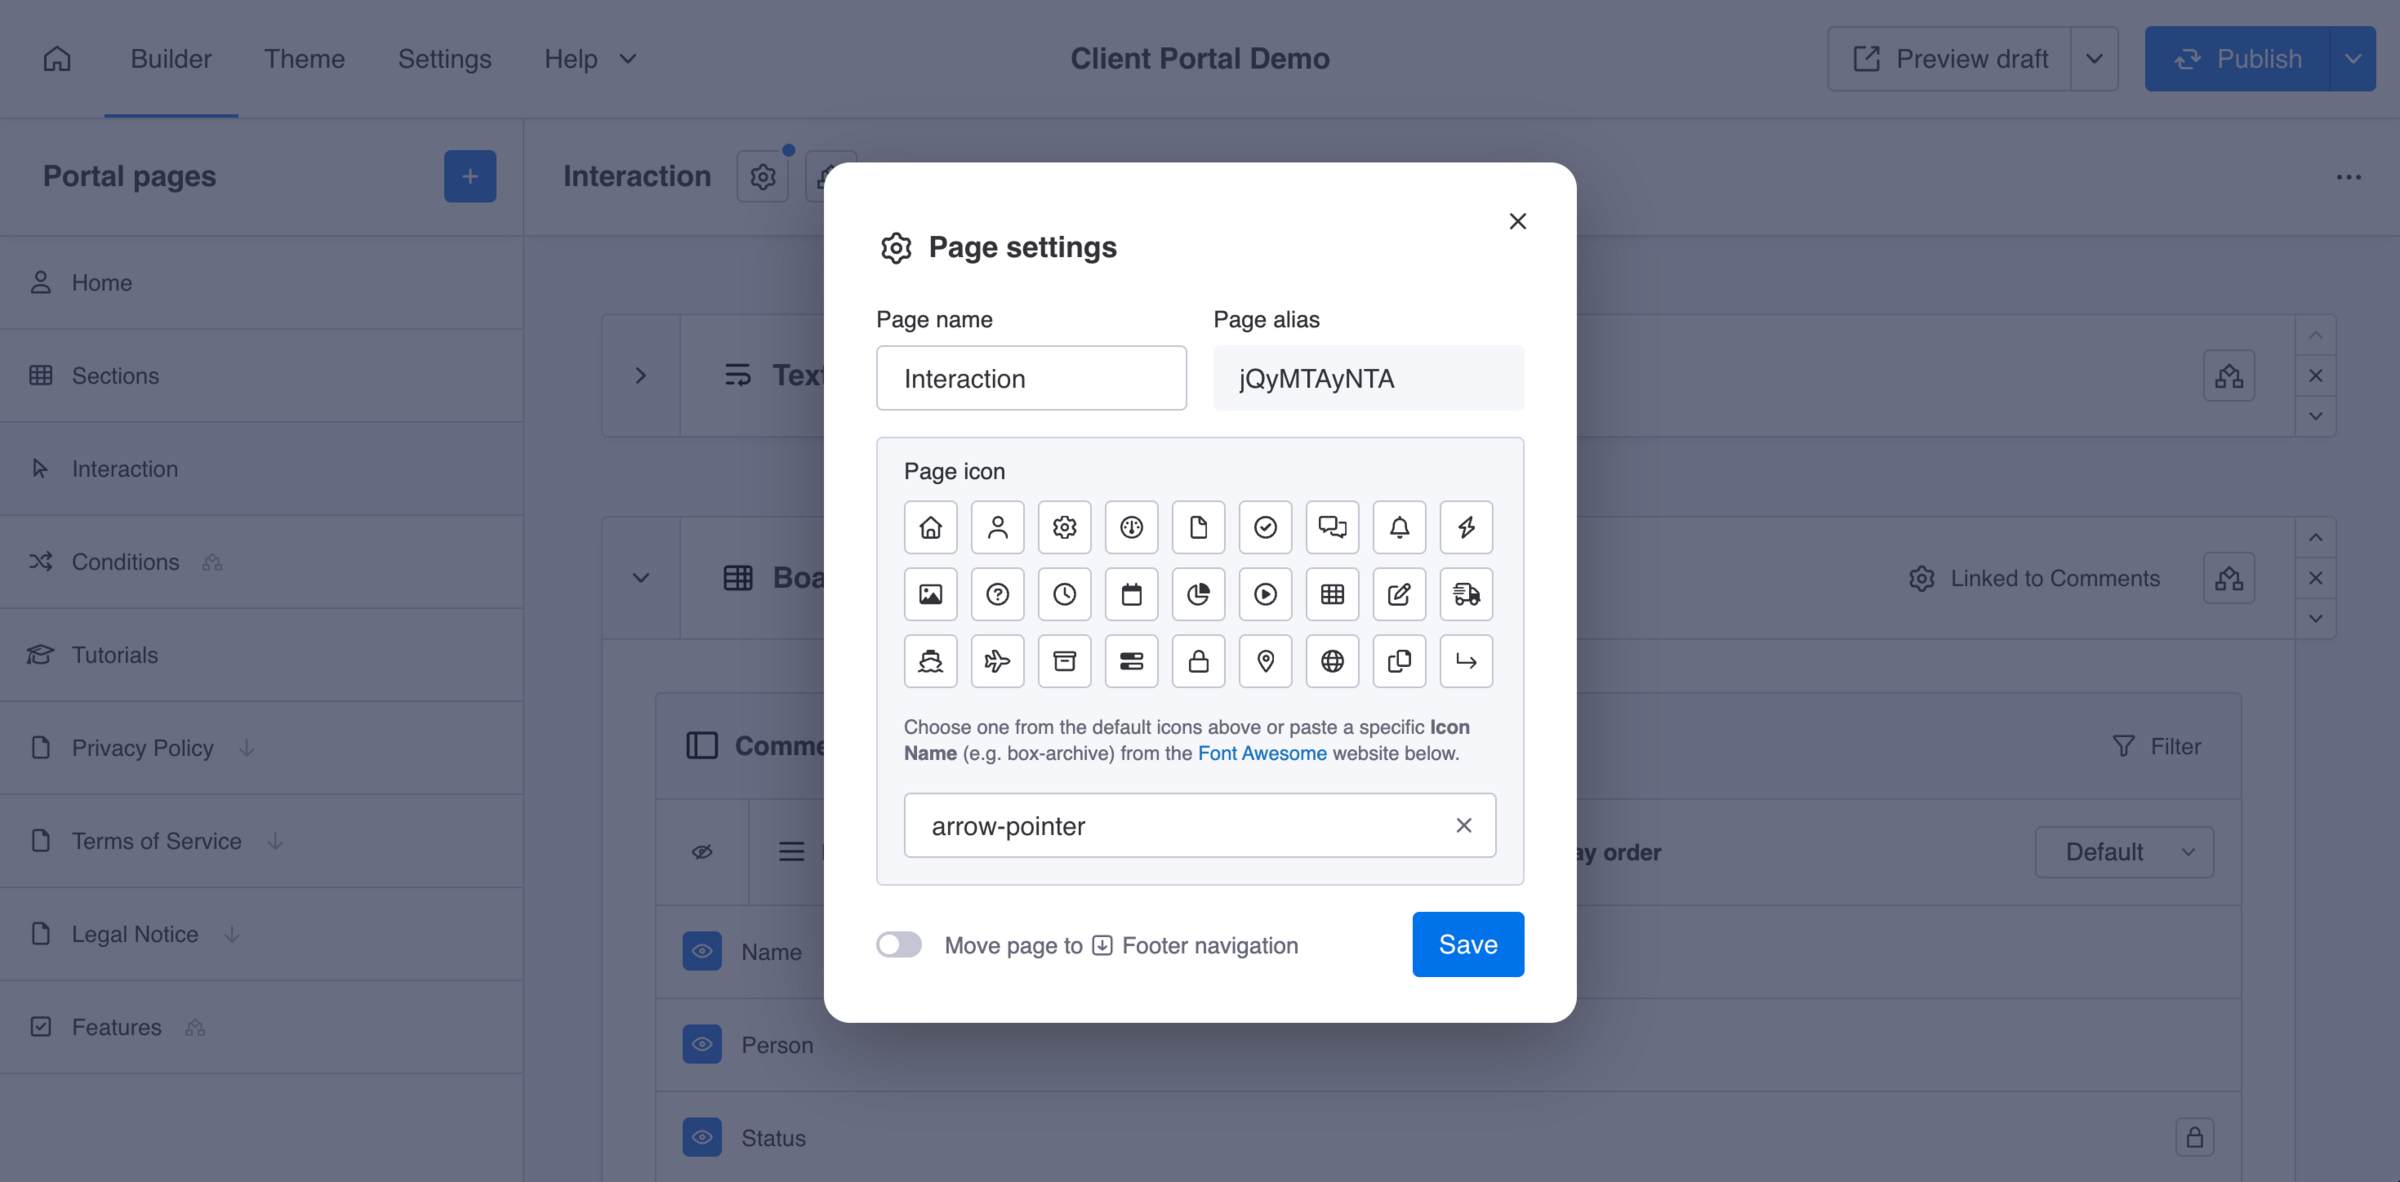
Page settings
Configure page name, icon and navigation
Open the page settings to customize how a page appears in your portal navigation. Update the page name shown to clients, choose a page icon, and optionally make the page appear in the portal footer navigation for e.g. legal content.
- Page name
Mandatory - Page alias
MandatoryUniquea-z
Default page aliases can be overwritten with readable slugs, though start is reserved and an alias must be unique. Existing aliases in Teaser sections will not update automatically, you will have to manually reassign them. - Page icon
Optional - Page placement
OptionalMain navigationFooter navigation
Did you know?
The Page alias is used internally for linking and routing within the client portal.
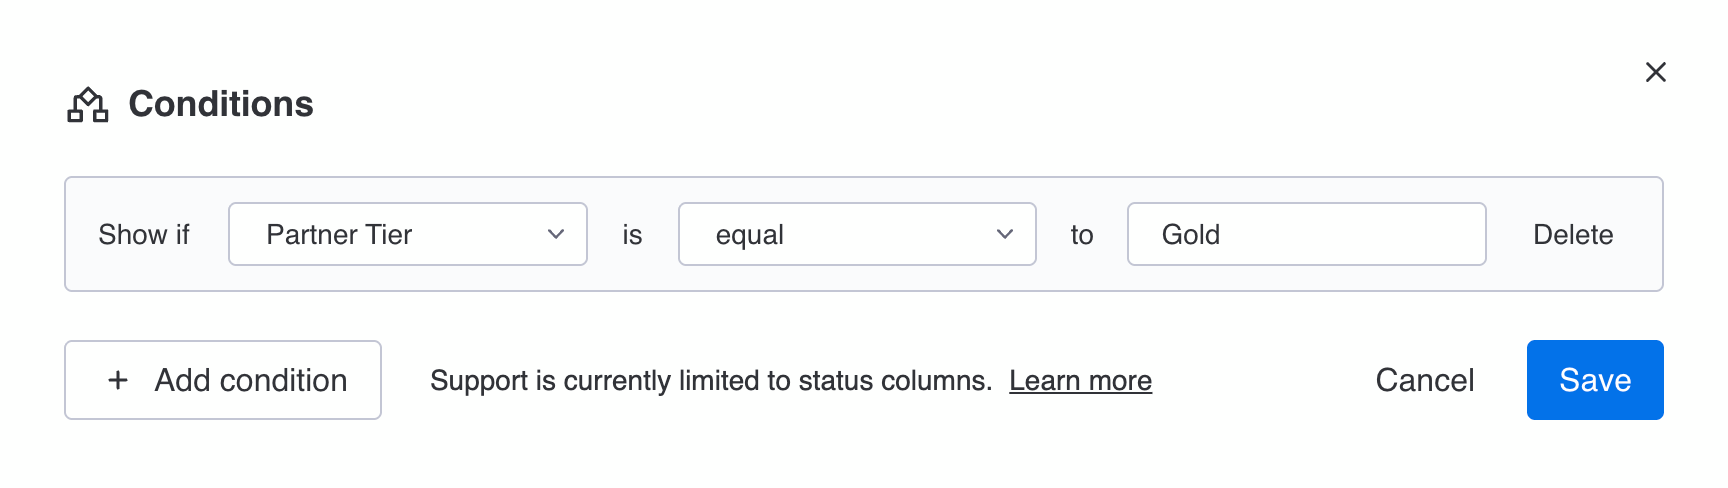
Page conditions
Show or hide pages based on a client status
Use conditional pages to display specific pages only to clients that match certain conditions, such as a specific status in your Clients Board. Learn how to set up and display a page conditionally.
Page visibility
Hide pages when working on drafts
Use page visibility to hide individual pages from clients in their portal when working on new draft content.